Boston Children's Museum
308 Congress Street, Boston, MA 02210
617-426-6500
© Boston Children’s Museum 2025
Website Design by JackrabbitChildren get too few chances to experiment with materials and to design and build objects of their own creation. These Raceways and Roller Coasters activities allow your students these opportunities, and engage them on many different levels as well. Building these tracks and rolling marbles down them help children to develop problem-solving and teamwork skills and touch upon some basic principles of physics like energy, acceleration and momentum.
This activity is the second part of the “Raceways & Rollercoasters” series. It is not necessary for you to have tried Raceways & Rollercoasters – Marble Races before implementing this activity, but it is suggested. See the Purchasing and Preparing Pipe Insulation PDF (click here to open) if you have not already prepared the materials.
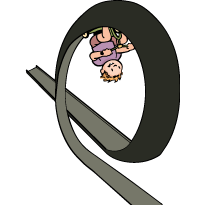
Ask your students if they have ever been on a roller coaster before. Did that roller coaster have any loops? What is a loop? Are these loops usually big, small or different sizes? Ask if any of your students are willing to come up and draw a loop like one they’ve been on or seen, and have them draw it on a piece of chart paper, dry erase board or chalk board.
Can you make a loop with your raceways track that your marble can travel through and make it out the other side?
After 10–15 minutes, stop your students and bring them together to share their observations with each other. Is it easy or hard to make a loop? Does anyone have any suggestion for the other teams on how to make a successful loop? Look for ideas on how to create a loop that keeps its shape, and how to attach the pipe insulation so that it stays together. Did any teams think about the last activity (Marble Races) and whether the angle or steepness of the track makes a difference in the success of their loop? What sort of angle seems to work well? This discussion should last no more than 5–10 minutes.
Have teams continue to attempt to make successful loops. If most teams are having success, challenge them to make the biggest and/or smallest loop they can make. Near the end of the session or when all teams are done, bring all of the teams together to compare their results. What was the biggest loop they could make? What was the smallest?
Boston Children's Museum
308 Congress Street, Boston, MA 02210
617-426-6500
© Boston Children’s Museum 2025
Website Design by Jackrabbit