Boston Children's Museum
308 Congress Street, Boston, MA 02210
617-426-6500
© Boston Children’s Museum 2025
Website Design by JackrabbitAre bubbles always round? Does a bubble look the same in the air as it does on the table, or in a soda bottle—or in a cube? Experiment with these materials and find out!
This activity should take place after the Bubbles activity from this curriculum.
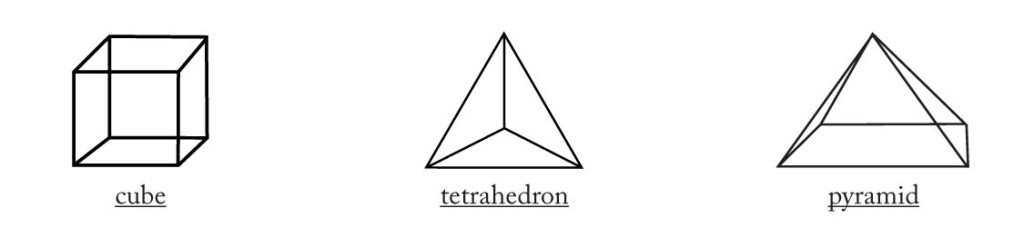
Make a 3-D shape out of pipe cleaners. Some shapes you might try (see Figure 1). Test these shapes out in the soap bubble solution you have prepared.
Ask your students what shapes they’ve seen when blowing bubbles. They’ve seen a bubble in the frame of their bubble maker—that was a flat sheet. They’ve seen bubbles flying through the air—those were more round. What might a bubble look like in containers and objects of different shapes? Show them the shape you made, and ask for their guesses as to what the bubbles inside of the 3-D shape might look like if you dipped it into bubble solution. After collecting their guesses, dip it in, and show them the results.
Create your own shapes and explore what the bubbles look like inside.
After 5–10 minutes of activity, if every team has made and tested at least 1 shape, stop your students and bring them together to share their observations with each other. What shapes were the bubbles? What else did they observe? This discussion should last no more than a few minutes.
Send them back to create more bubbles, carefully observing what they notice about their shapes. Ask them to now blow the bubbles out of the shapes. Will a bubble inside of a cube make a cube-shaped bubble when it is blown out? How about a pyramid?
Boston Children's Museum
308 Congress Street, Boston, MA 02210
617-426-6500
© Boston Children’s Museum 2025
Website Design by Jackrabbit