Boston Children's Museum
308 Congress Street, Boston, MA 02210
617-426-6500
© Boston Children’s Museum 2025
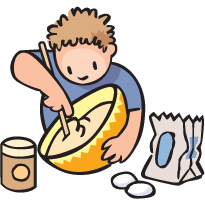
Website Design by JackrabbitCooking activities, even simple ones like this, are filled with great learning opportunities. Along with measurement and math skills, kids can develop problem solving and literacy skills as well. By experimenting with the ways that certain ingredients act and react with each other, children will gain an understanding of basic cooking chemistry, and will even learn about design as they create and make changes to their cupcake “prototypes”.
Key ingredients are flour, sugar, baking powder, egg beaters, milk, salt, butter (or oil) and vanilla. You can introduce any other ingredients as you’d like, although keep in mind that the more ingredients you have, the more complex the recipes will be and the more you’ll need to prepare for the activity. Management of the ingredients will be easier if they are divided into several cups, with teams sharing these cups of ingredients. Make sure to label the cups properly—sugar and salt can look very similar! If you don’t have an oven, use 2 or 3 toaster ovens. Several cupcakes can bake in a toaster oven at once. Make sure to use the foil cupcake cups if baking with toaster ovens, since a cupcake tin won’t fit in the toaster.
See Suggestions (Under “Make it Better”) for how you can do this activity using mini aluminum loaf pans (found in any grocery store) so that teams have their own mini cakes. The instructions that follow are for using cupcake tins.
Ask children if they have ever baked before. What kind of food did they make? Did they ever invent their own recipe? Tell them that they will be inventing a recipe for cupcakes, and then brainstorm a list of ingredients they might use. Once you have a list, show them the ingredients they’ll use to make cupcakes.
Can you make delicious tasting cupcakes from scratch without using a recipe?
While the cupcakes are baking, bring your students together to talk about the process. How did they decide how much of each ingredient to add? How did they measuring their ingredients? Look for a discussion about “leveling off” the spoonfuls so that the measurement is consistent. What do they think each of the ingredients do in the recipe? After about 5 minutes of discussion, have each team look at their cupcakes through the glass of the oven or toaster oven. Bring them together away from the oven and continue the discussion. What do they notice after 5 minutes? What do they predict will happen after 10 minutes? 15?
Once the cupcakes are done, carefully remove them from the oven to cool. Have the children look at their cupcakes and ask them to predict how they’ll taste. After 5–10 minutes of cooling, test the cupcakes to see if they are ready for tasting. Have the children taste the cupcakes and write down their observations. Bring them together to talk about their recipes, how their cupcakes turned out, and if anything surprised them. Look for cupcakes that look or taste very different, and compare their recipes. Use these recipes for a discussion with children about the role that the different ingredients in the cupcake batter might play. Ask your students what changes they’d like to make to their recipes if they were to make another batch.
Information on Ingredients:
Boston Children's Museum
308 Congress Street, Boston, MA 02210
617-426-6500
© Boston Children’s Museum 2025
Website Design by Jackrabbit