Boston Children's Museum
308 Congress Street, Boston, MA 02210
617-426-6500
© Boston Children’s Museum 2024
Website Design by JackrabbitDesigning and building small boats out of clay gives children a chance to practice critical observation skills, problem solving skills and communication skills as they work with their teammates. In addition, children are asked to manipulate an intrinsically interesting material that at first seems not quite right for the job—until they explore a little more and discover the possibilities.
Try this activity ahead of time so that you are familiar with it. Gather the pennies or washers, but make sure to use one or the other, not both. It is important that the weights all be consistent. If using washers, they should be 3/4″ or 5/8″ wide. Divide the clay into smaller pieces. If you bought clay that came in sticks, break the sticks in half—each half will be around 2 ounces, which is about the right amount for this activity. Fill the bin or buckets with water, 6″–10″ deep.
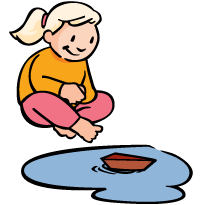
If you have already done the Float Your Boat – Metal Boats activity, ask your students about the shapes they tried when they made their foil boats. What shapes worked best? What shapes didn’t work as well? If this is your first boat activity, ask your students if they have ever been on a boat before. What are boats made of? What shapes are boats usually made in? Show your students a rolled-up ball of modeling clay and ask them if they think it will float. Drop it in the water. Tell them that today they will be challenged to make a floating boat out of clay and to design it so that it holds as much weight as possible without sinking.
Use the materials you’ve been given to create a boat that holds as much weight as possible.
After 10 minutes or so, when each team has begun testing their first designs, gather your students together to talk about what they have discovered so far. What are some of the shapes they have tried? Have teams hold up their boats or draw the shapes on a chalkboard or piece of chart paper. How much weight (how many pennies or washers) did these different shapes hold? Do some shapes seem to work better than others? Make sure to also ask each team how they are putting the weight into their boat. Are they stacking the weights all in the middle or spreading the weights out? Does this make a difference? Was this easier, harder or about the same as making boats out of aluminum foil?
Send teams back to explore some more and to try to make the strongest boat they can. Near the end of the session, bring all the teams together again to share their conclusions.
Boston Children's Museum
308 Congress Street, Boston, MA 02210
617-426-6500
© Boston Children’s Museum 2024
Website Design by Jackrabbit