Boston Children's Museum
308 Congress Street, Boston, MA 02210
617-426-6500
© Boston Children’s Museum 2024
Website Design by JackrabbitSome of the most important tools that scientists use are the simplest ones. By giving children a chance to make the tools that they will use, they can gain insight into how these instruments work and can then investigate the world around them. In this activity, children will create what has to be the simplest scientific instrument of all – a tool called a nephoscope that helps scientists determine the direction that clouds are moving, which also tells them the direction that the wind is blowing above them.
Gather all materials and make sure that your compass is working. If you do not have a compass, find a way to determine which direction is North. You might have your students help you with this. What direction does the sun rise in? What direction does it set in? See Suggestions below for some ways to find North without a compass.
Ask your students if they have ever looked at clouds before. Have they ever seen “shapes” in the clouds? What sorts of things have they seen? Aside from the shapes we can imagine seeing in them, are there other things that clouds can tell us? Encourage a discussion about how the shape, and movement of clouds can give us clues as to the weather that is in our near future.
Create your own cloud viewer and figure out what direction the wind is blowing.
After a few minutes of using their cloud viewers, bring the whole group together to talk about what they observed. What did they notice when they looked at the clouds through their viewers? Is there a way they might use these instruments to tell them which direction the wind is blowing? How might that be helpful? This discussion should only last a few minutes.
Depending on the age of your students, you may want to have a discussion about the directions North, South, East and West. Ask your students if they know some of the directions that the wind might blow and have them name at least the four mentioned above.
Nephoscopes are used by scientists to determine the direction, altitude and speed that clouds are moving. This nephoscope is more simple and just tells the direction that clouds are moving, but this can be useful information. Wind at ground level can swirl around because of obstacles like hills and buildings, so it is sometimes difficult to tell the true direction of the wind. By looking at the direction the wind is traveling higher in the atmosphere, we can determine where any weather (like clouds in the distance) is coming from.
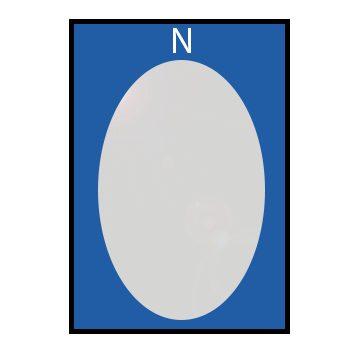
After the group discussion, have teams return to their cloud viewers, but this time ask them to all place their viewers on the ground with the “N” facing North. Ask them to now look at their viewers and figure out which direction the wind is blowing. If, for example, they look in their mirror and see the clouds above them moving from the bottom of the mirror up toward where the “N” is written, then the wind is blowing to the North, from the South. Come to an agreement among the group as to which direction the wind is blowing in.
The Shadow-Tip Method
The Watch Method (only works in the Northern hemisphere)
Earth and Space science activities were developed with the support of NASA. This material is based upon work supported by NASA under grant award number NNX14AQ83G. Any opinions, findings, and conclusions or recommendations expressed in this material are those of the author(s) and do not necessarily reflect the views of the National Aeronautics and Space Administration (NASA).
Boston Children's Museum
308 Congress Street, Boston, MA 02210
617-426-6500
© Boston Children’s Museum 2024
Website Design by Jackrabbit