
Boston Children's Museum
308 Congress Street, Boston, MA 02210
617-426-6500
© Boston Children’s Museum 2025
Website Design by JackrabbitAdinkra are unique symbols created in West Africa, especially in Ghana. They are often used on pottery, woodcarvings, in logos, and they are especially beautiful when stamped on fabric. The Ashanti people of Ghana originally created Adinkra cloth to wear on special occasions, like funerals and weddings, and to important religious ceremonies. Adinkra stamps are symbols that represent specific feelings, events, things, or places. See some examples of Adinkra symbols and what they mean in the Adinkra Glossary (Click here for the PDF).
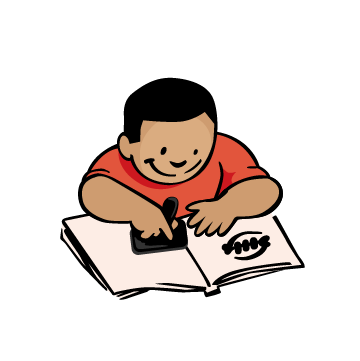
Adinkra stamps can be made from anything that is relatively easy for students to cut, but firm enough to hold up through repeated stamping. You may want to try different materials available to you to see what works best. As an alternative to the potatoes, you can try foam produce trays (make sure to wash them), styrofoam plates, or sponges as mentioned above. Be sure to experiment with whatever medium you choose before you try this activity with your students! If you are using the potatoes as suggested you will need to assist, especially if you are working with younger children. First you should cut the potatoes in half and give one half to each student—have the students etch the symbol they want on the cut side of half a potato with a pencil or pen and then you or another adult can use a sharp knife to cut away the rest of the potato, leaving a stamp. When selecting paint for this activity, limit the selection to just a few dark colors—this is a craft where the symbols are more important than the color scheme. It will also be easier to stock paint “stations” if fewer colors are offered. This activity works best following the Adinkra activity in this curriculum.
If you have already done the Adinkra activity, ask your students what they would do if they wanted to create many copies of the symbols they created. Could they do it quickly or would it take them a long time? How could they make it easier to do? Have your students ever used a rubber stamp? What symbols get stamped, or printed, onto paper or other places? Could they tell a story with adinkra symbols?
If you have not done the Adinkra activity, ask your students what a “symbol” is and discuss familiar symbols (ex., a heart is a symbol of love; a red octagon is the symbol for “stop” in this country; the peace symbol is a sign of peace, etc.). What makes a picture a symbol? What are some symbols that everyone knows? Could symbols be used to tell a story? Use a whiteboard or poster paper to brainstorm symbols and have kids help you draw common symbols. Show children the Adinkra Glossary (Click here for the PDF).
Create stamps based on one of the Adinkra symbols from the Adinkra Glossary and use your new stamps to tell a story on paper or cloth.
After each student has created a stamp, bring the group back together to talk about how it’s going, and what they’ve tried. Does anyone have tricks or tips to share with the group about making good stamps? How did they decide what symbols to use? Is it hard to tell a story using just one symbol? Could they share each other’s stamps to tell stories using multiple symbols? Ask each student or team to show their symbol to the other students and talk about what its meaning is.
After each student or team has showed off their work, students should begin choosing the other symbols they would like to use to tell their story, then share the stamps with each other. Depending on the age and level of cooperation of your students, you can arrange this stamp sharing differently—from simply having students work the sharing out themselves, to arranging a “sign up board” for each symbol so that the sharing is more organized. Once this sharing is arranged, send students back to make their stamped stories. When finished, hang stamped “adinkra” stories up to dry and if time allows, invite each student or team to tell the group about the story their adinkra art depicts.
Boston Children's Museum
308 Congress Street, Boston, MA 02210
617-426-6500
© Boston Children’s Museum 2025
Website Design by Jackrabbit